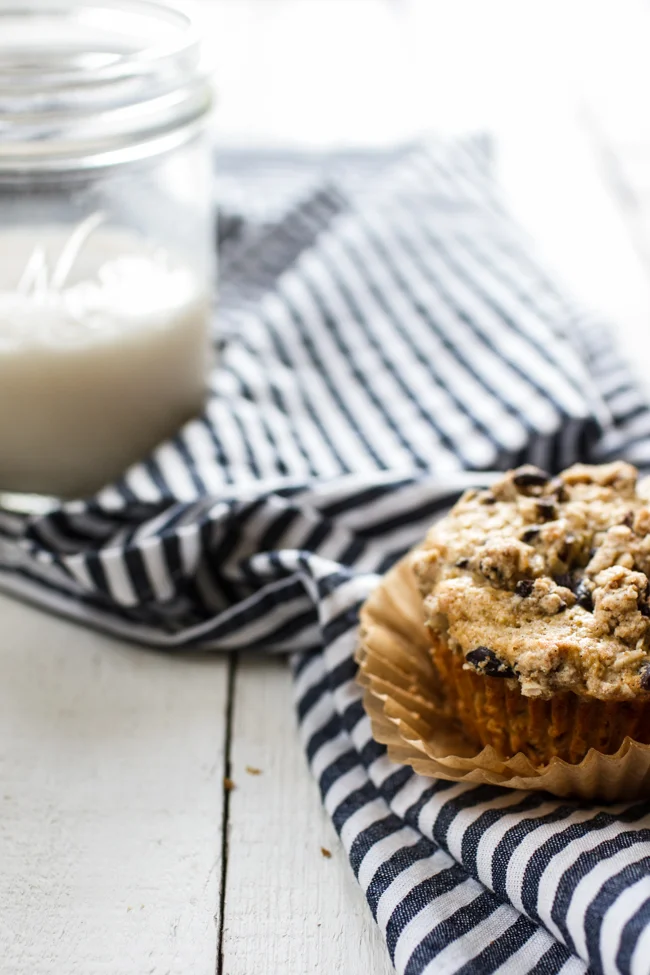
Vanilla Muffins

Friday! Friday!

We're starting this Friday off right with vanilla muffins. Vanilla muffins that are so full of goodness I can hardly stand it. I would definitely call myself vanilla obsessed. It's one of my all-time favorite kitchen ingredients and plain as it may be, my favorite ice cream flavor. 

This post is sponsored by Rodelle. All products have been tested and approved by my taste buds. 

Vanilla Bean Crumb Muffins | Edible Perspective

A few months ago, I had the chance to meet some of the staff at Rodelle to learn everything there is to know about vanilla. Well, maybe not everything but a whole heck of a lot. I've been a long time fan of Rodelle's vanilla products, but I'm thrilled they reached out so I could learn even more. 

What stood out most to me was how they frequently visit the farms in Africa for more than just quality control of their product. While quality is very important, they focus much of their time and effort in making sure there are safe and sustainable working environments for the farmers. They also help support the communities as a whole by providing things like clean drinking water, safe cooking stoves, and with the microfinance program. Rodelle did not ask me to tell you any of this, but I was so impressed by their efforts and felt compelled to share. 

Vanilla Bean Crumb Muffins | Edible Perspective

While the vanilla beans I received from Rodelle were the most fragrant, sticky, and plump I've ever encountered (honestly), I wanted to see if steeping them in hot water would make it easier to scrape the seeds and result in a larger yield. This totally worked! No vanilla beans were left behind! It was nice to feel like no beans were going to waste. I'm sure it's especially helpful if your beans have dried out a bit.

Recently, I was also able to tour the factory in Ft. Collins to take photos for a freelance project. I cannot even describe the intensity of the vanilla aroma that takes over the entire facility. I obviously loved it.

Vanilla Bean Crumb Muffins | Edible Perspective

Have you ever made vanilla sugar before? I used muscovado sugar (it tastes like caramel sugar!) and followed Alton's simple instructions. As if my vanilla obsession wasn't bad enough.

I used the vanilla muscovado sugar as an alternative to the vanilla crumb topping for a few of the muffins. So good either way or with some of both! 

Vanilla Bean Crumb Muffins | Edible Perspective

I also learned something about crumb topping in my trials.  

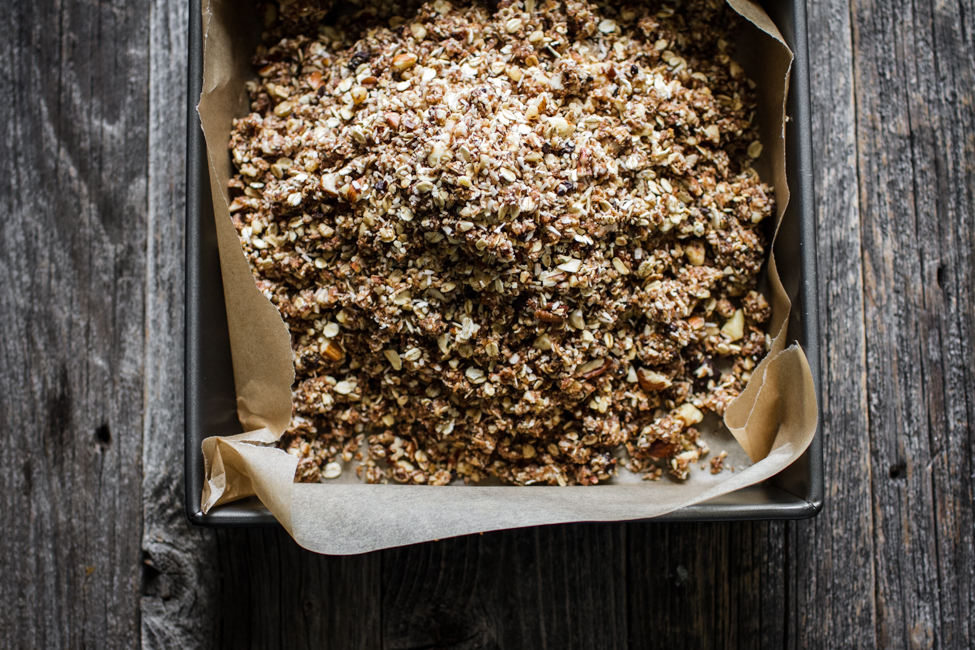
If you melt the coconut oil (or butter in some crumb topping recipes) you'll achieve a chunkier topping like you see below. However, if you use softened coconut oil (or butter) it will result in more of a crust topping that spreads over the entire muffin. It seems like the opposite should happen as the dough with the softened coconut oil is much crumblier before baking. But for whatever sciency reason, the melted oil gives you that real-deal "crumb" look.

Moving on....

Vanilla Bean Crumb Muffins | Edible Perspective

And because I'm slightly strange and don't like crunchy things in my muffin but they're okay on top of my muffin, I've added cacao nibs to the crumb topping.

It provides a delicate crunch and slightly bitter, chocolaty bite to contrast all of that sweet vanilla flavor.

Vanilla Bean Crumb Muffins | Edible Perspective

Print Recipe!

Vanilla Muffins with Crumb Topping 

heavily adapted from my citrus poppy seed muffins (guest post on 80-twenty)
gluten-free // yields: 12 standard muffins

for the crumb toppings:

  • 3 tablespoons melted coconut oil
  • 1 teaspoon pure vanilla extract
  • 1/2 cup + 2 tablespoons gluten-free oat flour
  • 1/4 cup gluten-free rolled oats
  • 3 tablespoons muscovado sugar (or coconut sugar/sucanat)
  • pinch of salt
  • 3-4 tablespoons cacao bean nibs

for the muffins:

  • 1 cup gluten-free oat flour
  • 3/4 cup almond flour
  • 6 tablespoons muscovado sugar (or coconut sugar/sucanat)
  • 1/4 cup sorghum flour
  • 2 teaspoons baking powder
  • 1/2 teaspoon salt
  • 1/4 cup milk
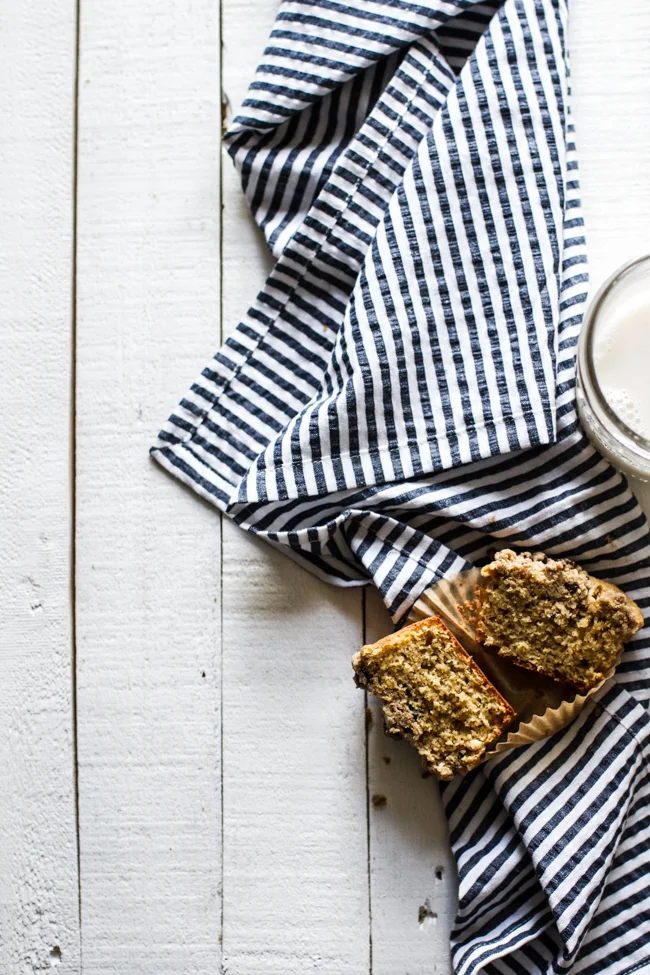
  • 1/4 teaspoon packed vanilla beans, scraped from appx. 2 plump pods
  • 3 large eggs
  • 1/4 cup applesauce
  • 1 tablespoon pure vanilla extract
  • 1/4 cup melted unrefined coconut oil (lightly cooled)

Preheat oven to 350° F. 

Pour the coconut oil for the crumb topping in a small mixing bowl. Add the vanilla extract and stir. Then add the oat flour, oats, sugar, and salt. Stir/mash with a fork until a cohesive dough forms, similar in consistency to a soft cookie dough. Mix in the cacao nibs. Set aside. 

Line a muffin tin with 12 liners.

In a large bowl stir the oat flour, almond flour, sugar, sorghum flour, baking powder, and salt until well combined.

In another bowl, briskly whisk the milk and vanilla beans together until the beans are evenly distributed. Add in the eggs, applesauce, and vanilla extract and whisk until well combined. Whisk in the oil and then immediately pour into the dry bowl. Stir until you no longer see dry flour.

Scoop into the muffin liners, filling about 3/4 of the way to the top. Break up the crumble topping and sprinkle over top of the muffins. Quickly place in the oven and bake for 17-22 minutes, until the edges are light golden brown and a toothpick comes out nearly clean. You want the toothpick slightly sticky (but not gooey). Let cool for 10 minutes in the pan and then transfer to a cooling rack. Allow to cool for at least more 20 minutes before serving.


Notes:

  • I used Rodelle's Pure Madagascar Vanilla Extract and Madagascar Vanilla Beans in this recipe.
  • To get the most from your vanilla beans, steep them in hot water for about 10 minutes. Then, blot dry, trim the ends with a pairing knife, slice down the center (through the top layer only), and scrape the entire inside of the pod with the dull side of your knife.
  • I do not recommend subbing any flours. However, for a stickier/denser muffin, use 1 cup oat flour and 1 cup almond flour and leave the sorghum flour out. The sorghum helps lend a fluffier texture.
  • If you don't have vanilla beans on hand: sub 2 tablespoons vanilla paste, or 2 tablespoons pure vanilla bean extract
  • In the crumb topping, feel free to add a small pinch of vanilla beans if desired. Or, instead of 1 teaspoon pure vanilla extract, sub 1 teaspoon vanilla paste.
  • If you want more of a crust on top of the muffin rather than a crumb topping, use 3 tablespoons softened unrefined coconut oil and reduce the oat flour to 1/2 cup. The dough will be crumbly.
Vanilla Bean Crumb Muffins | Edible Perspective

Happy weekending!

Ashley

This post was sponsored by Rodelle. Opinions are always my own and products are thoroughly tested before sharing. Thank you for supporting the occasional sponsored post that helps fund all the deliciousness you find here!

Oat + Nut Chewy Granola Bars (date sweetened!)

Did I ever tell you about the time I started a granola bar business? Actually, I know I told you, but it was eons ago. If you've been reading from eons ago, you may remember this. If you lived in Charlotte, NC maybe you even sampled a bar at the farmer's market? 

Nut + Oat Chewy Granola Bars (sweetened with dates!) | edibleperspective.com

I started the business because I was tired of store bought granola bars and their mile-long ingredient lists. I wanted to create an oat-based bar that was chewy, full of flavor, and short on ingredients. It took some time to develop the recipe, and at first, I had no intention of turning it into a business.

It's kind of a blur as to how that all even happened. I remember some tears, numerous trips to the business license office, and 40lb bags of rolled oats. I sold the bars at a farmer's market in Charlotte and a few local convenient stores the summer before moving to Colorado. I didn't continue the business after we moved because it just wasn't financially feasiable at the time, with having to rent commercial kitchen space, etc.

It was a (mostly) fun adventure while it lasted.

Nut + Oat Chewy Granola Bars (sweetened with dates!) | edibleperspective.com

Anyway!

I've always been a huge fan of oat-based granola bars but there aren't actually too many on the market. Today I'm sharing my latest recipe for chewy granola bars that are 100% date sweetened, super chewy, but still packed with texture!

Nut + Oat Chewy Granola Bars (sweetened with dates!) | edibleperspective.com

You may be thinking, is this just another Larabar knock-off recipe? And my answer is no! They're filled to the brim with oats, nuts, coconut, seeds, and more. You really don't even realize they're a date based bar! The dates bind the bars together and give them their sweet, chewy texture, but these bars are all about the mix-ins.

The dates are actually turned into a paste and then combined with coconut oil and a bit of nut butter to further help bind the bars together. 

Nut + Oat Chewy Granola Bars (sweetened with dates!) | edibleperspective.com

I wouldn't change around the ratios much, as these amounts are what worked well with the specified amount of dates that were used. If you use more mix-ins than specified the bars will not hold together. You'll end up with more of a granola-type mixture, which wouldn't necessarily be a bad thing and would at least be highly edible! Here are my (un-tested) thoughts on subbing some of the ingredients. 

Substitution Tips:

  • Dates are mandatory in this recipe. Specifically, medjool dates will work best. (Costco even sells these in bulk for a great price!)
  • If you don't have hemp seeds you could add well chopped sunflower seeds instead or even chia seeds. 
  • It's important that the nuts are well chopped before adding to the food processor, or the grinding will be too uneven (you'll get flour too quickly while still having some un-chopped nuts).
  • If you don't want to add the chocolate, you can simply leave it out and replace with 3-4 tablespoons of nuts (be sure to chop and process them as specified below).
  • Instead of coconut, feel free to sub another 1/4 cup of hemp seeds and 2-3 tablespoons of chia seeds instead. 

There's a little play with this recipe, but I found the mixture below  to work best. When I left the ingredients larger they were more difficult to chop and crumbled more.

Nut + Oat Chewy Granola Bars (sweetened with dates!) | edibleperspective.com

Print Recipe!

Oat + Nut Chewy Granola Bars (date sweetened!)

gluten-free, vegan // yields 16 bars

  • 1 3/4 cup gluten-free rolled oats
  • 1 cup well-chopped raw nuts (a mixture works well - almonds/walnuts/pecans)
  • 12-15 medjool dates*, pitted
  • 3 tablespoons softened unrefined coconut oil
  • 1 tablespoon thick nut butter (I used cashew butter)
  • 1 teaspoon pure vanilla extract
  • 1/2 cup finely shredded unsweetened coconut
  • 1/3 cup finely chopped dark chocolate
  • 1/4 cup hemp seeds
  • 1 teaspoon cinnamon
  • 1/2 teaspoon fine grain sea salt

Preheat your oven to 300° F. 

Place oats in your food processor and process for 5-10 seconds until ground into a course meal. You still want some whole oats to remain (refer photo 2). Toast on a baking sheet for about 15 minutes, stirring once, or until light golden brown and fragrant.

Place chopped nuts in your food processor and turn on until finely chopped. You want about 1/2 course meal and 1/2 small bits. Place on a baking sheet and toast for 10-15 minutes, stirring once, until lightly toasted.

Remove both and let cool for at least 10 minutes.

Increase oven to 350° F. 

Line a 9x9 cake pan with parchment paper. 

While toasting the oats and nuts, wipe out your food processor. Place the pitted dates in your processor and turn on until a smooth paste forms. This takes about 30 seconds - 1 minute. They'll go from chopped, to a large ball, and finally smooth out into a smooth paste. You'll end up with 1/2 heaping cup. Scrape sides as needed (refer to photo 4). *edited to add - 4/20/15: You may want to start off with 15 pitted dates to make sure you have enough for binding. Date size and plumpness can vary, so it will be best to have a little extra. After it turns to a paste scoop out about 2 1/2 tablespoons of the paste and set aside. Mix into the oat mixture at the end (before pressing into the pan) if it's is too crumbly and won't hold together when compacted. If you don't need the extra paste, simply store it in a sealed container in the fridge and use as a topping or add to smoothies. Mine held together great with 12 dates.

Transfer the date paste to a large mixing bowl. Stir/mash in the coconut oil, nut butter, and vanilla until well combined. Add the cooled oats, nuts, coconut, chocolate, hemp, cinnamon, and salt. Mix together with your hands until fully incorporated. The mixture will look crumbly but should hold together when squeezed. If it feels very soft and gooey add 1/4 cup more oats.

Empty mixture into your lined pan and spread evenly to the edges and corners. Place a piece of parchment over top and firmly press down with your palms until well-compacted and fully smooth from edge to edge. Be sure the corners well packed. It helps to get above the pan and put your weight into it. Press as firmly as you can.

Bake for 8 minutes.
 
Remove and let cool for 1 hour. Place the pan in the fridge and let chill for at least 2 hours. Carefully lift one edge of parchment and slide the bars and parchment from the pan to a cutting board (support the bottom with your hand or flat spatula). Chop into bars with a long, sharp knife. Keep tightly covered in the fridge for 1-2 weeks. 


Notes:

  • Make sure your dates are plump and fresh (they should be very tacky/chewy). If your dates are on the small side you may need a few extra. 
  • The edges/corners may crumble a bit when chopping but if your nuts and oats were well ground they should hold together well. 
  • Bars can be stacked in an airtight container or individually wrapped and kept in the fridge. They'll hold together in cool/moderate temps but soften once warm.
Nut + Oat Chewy Granola Bars (sweetened with dates!) | edibleperspective.com

Mmmmmm, Friday! Enjoy it!

Ashley

psst! Follow my weekend adventures over on Instagram while I'm in California for a small blogger retreat at the (amazing!) Terranea Resort