
diy bathroom renovation
/Last week, I mentioned that we started a mini bathroom renovation. I worked primarily on the demo + remodel of the bathroom, while Chris did a million other things around the house. We cannot believe the transformation the bathroom took in just two weekends! Below is a timeline of the transformation the bathroom took, starting just after we bought the house two years ago.
Our original plans were to hold out until we could afford a complete bathroom renovation. We had grand plans of a pocket door, moving the toilet where the current vanity is, adding a larger vanity and moving it, replacing the flooring, and replacing the shower tile. However, we got antsy and decided to give the bathroom a mini makeover instead. The only things we didn't replace were the flooring and shower tile and we left the toilet + vanity in their current locations.
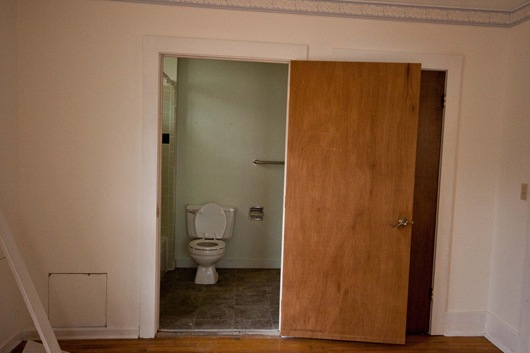
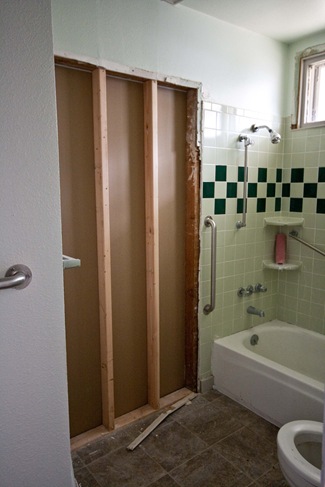
At the very beginning of our demo work we actually had a huge door going from our bedroom into the bathroom. Since we only have 1 bathroom we wanted to keep it a little more private, so we decided to remove the door and patch the giant hole.
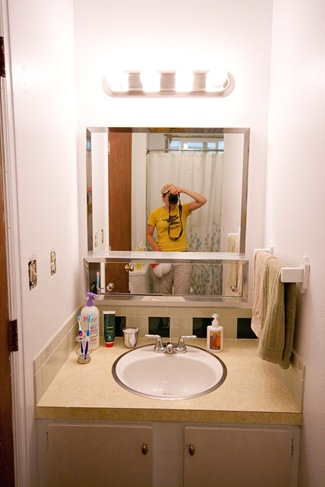
The walls were originally green and the vanity and sink were in horrendous condition. Chips, rust, mold, you name it.


After our first very mini bathroom renovation, we painted the entire room white to look as clean as possible.

We also changed out the light fixtures, painted the vanity doors + towel rod, and fixed the chips in the sink. Very minor things. Most of our time was spent renovating the kitchen which we fully gutted.
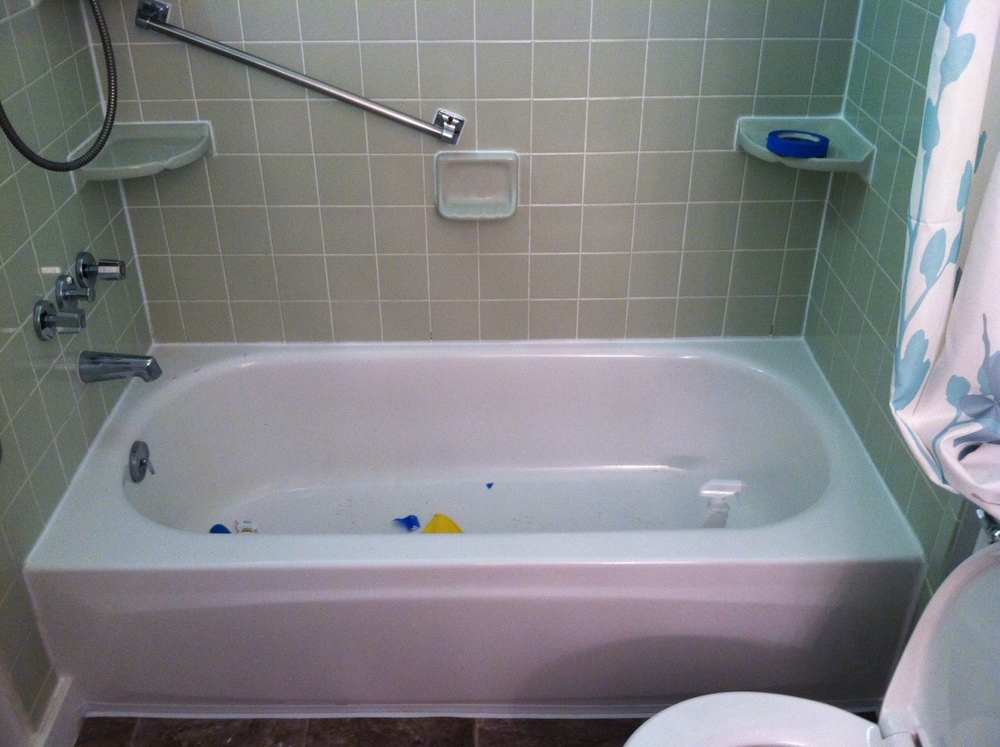
Then, a few months back I finally decided to tackle the mold + mildew in the tub. It took about 5 hours to complete.

Taping makes caulking much easier + cleaner! I am not the biggest fan of caulking but am slowly getting the hang of it.

What a difference that made! I was kicking myself for not doing it sooner.
And now, the latest phase of our bathroom renovation.

If you follow me on Instagram you're probably familiar with some of these photos.
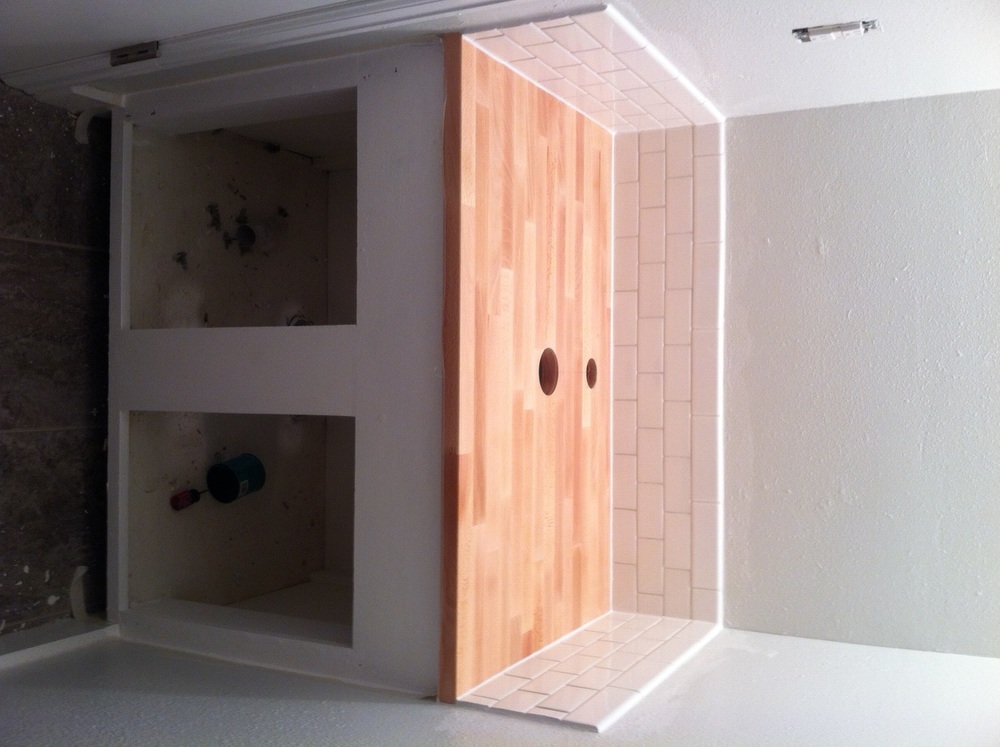
First, the mirror came down. Then, I chiseled the tile off the wall. After that, the counter + sink pretty much lifted right out. I also took off the old doors in hopes of replacing them.
But apparently, it's not the easiest thing to just buy two new cabinet doors. I checked at Home Depot and they take 3 weeks to come in. Not ideal. The cabinet doors at Ikea all have large holes cut into the inside of the door to match with their hidden hinges which wouldn't work with our existing cabinet. Next, I checked with a local store called ReSource. It's basically a store where you can donate any excess/used/new building materials. Kind of like a Thrift store but for building supplies. It's pretty fantastic. They have everything from counter remnants, to [hundreds] of interior + exterior doors, windows, cabinets, fence materials, wall + floor tile, bath tubs, a tool rental area, and so much more. Their assortment of cabinet doors is vast but I wasn't able to find the right size. Instead, I decided I would give our existing cabinet doors an upgrade.

We weren't able to simply remove the vanity and install an all-in-one vanity/sink combo because of the slightly strange size of this space. It would have left awkward 1-inch gaps on both sides. Also, the current flooring goes right up to the base of the cabinet and since we weren't looking to replace the flooring the best option was to leave the base of the vanity in place.
We decided on using butcher block counters from Ikea for the best looking + most affordable option. I'm currently obsessed with butcher block counters. We chose white for the backsplash to make the small space look as clean and bright as possible. Plus, you may know I have a thing for white. Their butcher block counters only come in 6-foot spans at about $125 a slab. To save money, I realized they had butcher block desk tabletops that were smaller and only $79. Instead of being 1 1/2-inches thick the desktop was only 1-inch thick, but the 1/2-inch was worth the savings. I bought this solid beech desk top.
*Note - If you decide to use Ikea's desk top for a counter note that the underside has metal tracking on the ends to attach legs to. This wasn't an issue for us as the span between the metal was large enough for the piece we needed to cut.

I should also mention that I painted the entire bathroom before starting the renovation. Half of the bathroom is a darker gray/green color and the vanity area and behind the toilet are a lighter gray/green color [both were on the same paint/color swatch so I knew they would match].
Compared to tiling three walls worth of backsplash in the kitchen this small area was a breeze! The sheets of tile also helped in comparison to placing 1 single tile at a time and having window framing, cabinets, outlet plugs, and light switches to work around. I think I only made about 10 cuts for this and finished in just over an hour. The kitchen backsplash took me a solid 40 hours to complete. Seriously!
I cut each 12x12 sheet in half lengthwise which allowed me to get 2 uses out of each sheet. Then, I added a row of single tiles above the halved sheets--with a bullnose top edge--to create a more finished look.

The next day I grouted + caulked.
I should mention before adding any of the tile I applied numerous coats of a water based finish to protect the wood. We decided to leave the wood natural so we did not apply any stain. Water based sealers take about 2 hours to dry before being able to apply a second coat, in comparison to 24 hours between coats with most polyurethane finishes. Also, the VOC levels for polyurethane finishes are extremely high. The water based VOC levels are significantly lower. I was able to get a 1/2 pint can for about $7.
To give the old cabinet doors a facelift I bought a long piece of trim at Home Depot to line the edges of the doors with. I painted the trim, cut it down, glued and nailed it to the doors, puttied around the exterior edges to hide any gaps, sanded for a smooth finish, then gave them another coat of paint. I used our excited brushed knickel handles but did add new hinges, as the old hinges were in terrible condition.
I couldn't believe the difference $14 made for these doors!
Did you ever think I'd actually get to the finished photos?
Here they are!

The mirror and shelf were also from Ikea.

I am absolutely in love with the sink, which we got for a great deal on amazon. At the time of ordering we got it for $195 [includes the sink, faucet, and drain] with free shipping. The quality was even better than expected.

This view is looking in from the doorway. Replacing the shower tile will be another project for another day and another year.

I want to note that while I'm making this whole bathroom renovation seem easy as pie, we faced a handful of problems along the way. My intention is not to complain about the work but just be realistic in that things don't always go as planned and most house projects take 2x [or longer] the amount of time + money than you planned for. We are definitely not home renovation experts or even close. We spend hours googling how to do things and still make plenty of frustrating mistakes along the way. For this project we ended up $39 over budget, which we had allotted $600 for. Not bad!
Especially after having to call a plumber...
To save money we decided to use a 3-inch hole saw to cut into the wood for the drain instead of the recommended 5-inch. We had no idea why a 5-inch hole was needed for a 1-inch drain and the directions were not specific. The 3-inch hole saw cost about $20, while the 5-inch cost nearly $100. We figured it wouldn't be an issue. That is until we had EPOXIED--as in, permanently placed--the sink and realized the 3-inch hole did not leave us enough room to fit tools into the space to secure the drain. Major fail. We thought we were going to have to rip out the counter since the sink was fully fastened to it. However, we decided to call a plumber for professional help. He installed a different type of drain that worked with the 3-inch hole and installed new pipes under the sink. It was definitely worth the cost to put our minds at ease and know that everything was installed + working properly.

We also added a new cabinet from Ikea that I am loving. We were always lacking storage for items used on a daily basis that you want easy access to. This fixed that problem and I love how it looks. The quality was better than expected for $49.
Before going over the whole cost breakdown I also want to mention that we had minimal waste from this project. I was able to donate or recylce nearly every piece of what we got rid of. While it's not always doable to donate and recycle old materials it was worth the extra effort in finding out!
porcelain tile + sink --> recycled
vanity mirror --> donated
wood towel rod --> recycled
particle board counter --> recycled

12x12 tile sheets - $2.50 x 7 = $17.50
2x6 single bullnose tiles - $0.75 x 14 = $10.50
grout - free! leftover from the kitchen
cement for backsplash - bought a small container that comes pre-mixed for $8
ikea butcher block desktop table - $79
paint - $40
wet saw for tile cutting - free! borrowed a friend's
sink/faucet/drain - $195
cabinet door trim - $8
door pulls - free! reused from before
hand towel rod - free! had it sitting in our closet
circular drill bits - $30
ikea mirror - $9.99
ikea glass shelf - $14.99
water based finish - $7
decorative grass + can - $5
ikea frosted glass cabinet - $49
brushed knickel door handles - $8
brushed knickel door hinges - $7
caulk - free! already had it from other projects
plumber...oops! - $150
other towel rods, light fixtures, curtain, etc. - remained the same
GRAND TOTAL - $638.98
We couldn't be happier with the fresh, new look of our bathroom. And we're once again kicking ourselves for not doing it sooner. All in all this was a fairly easy home renovation project.
To see the complete photo album of photos from this renovation and a few of our kitchen, check them out on Facebook.
Ashley
This post was not sponsored by Home Depot. ;) Also, please not that these are not step by step instructions but a general overview for this renovation.


