the week of the iPhone | snapseed how-to
/Per your request I’ve put together a little how-to for the iPhone app Snapseed. It’s my very favorite photo editing app on the iPhone.
This app has been on my phone for about the past 6 months but it really wasn’t until I started the week of the iPhone where I learned how to use it in more detail.
Since then, I’ve had fun improving my iPhone photo taking skills and maximizing the potential of my photos with this sweet little program. It makes you feel a little better when you forget your mac-daddy camera at home and only have your phone to capture whatever you’re deeming worth capturing. You can still make capture quality images with your phone! It’s also a bit less intrusive to grab a quick photo of something at a restaurant or when out with friends. And, hello…it fits in your pocket!
Okay, let’s get started.
1. Open Snapseed.
2. Click the “open” button to find [or take right then] the photo you want to use.
3. When you first download the program you’ll be prompted with how-to screens. Just tap to make them go away.
4. Decide if your photo needs any cropping, straightening, white balance, brightness, etc.
5. If you’re looking for white balance, brightness, saturation, and a few color options, click the “tune image” icon.
6. Slide your finger up and down on the screen and the following menu will pop up. Stop your finger on the tool you want to use. *This is one icon I just recently started using and has been an immense help! I almost always touch up white balance + brightness before applying any filters.
7. Once you stop on the tool you are going to change you’ll see the name pop up on the bottom bar. Now, slide your finger over the photo to the right or left to change the intensity.
-- An example of manipulating the white balance.
-- I felt good about the color with the white balance set to –3.
8. Repeat 6 + 7 if you need to make other changes. *I thought the photo needed a little brightening up so I corrected that next.
9. To apply any of the changes you’ve made, you must hit the arrow pointing to the right on the bottom bar of your screen. This is the only way to save the changes and then go on to making other edits. This however, does not save over the original photo you took. It’s using a copy.
You’ll see the screen say “processing” until it’s finished and then you’ll be directed back to the main screen.
tip #1 If you ever want to revert back and not save the changes hit the arrow to the left. It will take you back to the home screen and the image will be in the last state you saved it in.
tip #2 After you’ve made a change you can view what the photo looked like before the manipulation by holding your finger on the little “picture” icon in the top right hand corner.
10. Next up, I clicked the “crop” tool from the main page and then clicked the ratio icon in the bottom of the screen. I clicked on “orginal” to keep the photo at it’s original ratio. This way I didn’t end up with an awkwardly proportioned photo. However, if you want full control over what’s shown in the photo click “free” and you can change it any way you like.
11. To change the crop simply pull any of the corners or sides in the desired direction.
12. Then, click and hold your finger on the image and drag the crop box wherever you like.
13. Apply the changes by clicking the bottom right arrow if you are satisfied.
14. If I don’t want to apply any artistic edits [ie: vintage, drama, etc.] then I head right to the tool “center focus,” which you can find in the main menu. My very favorite tool!!
15. In this tool you can click the star with the 2 bars on the bottom of the screen. You’ll have a few different options for filters. Pick the one you like and then edit more from there.
16. Slide your finger up and down to select blur, outer brightness, or inner brightness.
17. Slide your finger to the right or left to manipulate the strength.
-- You may want to play around trying out the different filters again once you’ve changed the blur + brightness levels.
-- My favorite filters are “blur,” which creates extra blur in the background [bokeh!] and “vignette,” which brings a little darkness to the outside corners.
18. You can also move your focal point around by clicking on the photo and dragging the blue circle to the spot you want to be in focus. Then, to change the size of the area in focus simply use your pointer finger and thumb and drag them inward to tighten the area or outward to expand the area.
19. When you’re happy with the edits you’ve made and you’re on the main screen click the top right box with the arrow coming out of it to choose your sharing/saving method. I always choose “save to photo library.” This saves a new copy of the edited photo and keeps the original copy in your library as well.
And here is the finished photo!!
Now I’ll go through a few other photos I edited and which tools I used.
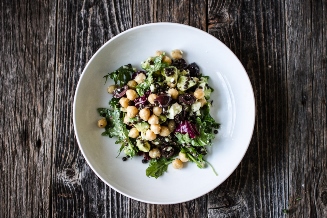
side note - I am a huge fan of bird’s eye view photos.
1. First, I cropped the photo slightly. You’ll notice in the photo above there is more space to the right of the centered plate in comparison to the left side. I wanted the plate centered, so I brought in the top right corner just a touch.
2. In “tune image” I saturated the photo slightly and increased the brightness.
3. In “center focus” I chose the “blur” filter and set it to 30. I also decreased the outer brightness so the corners weren’t as dark.
4. I increased the size of the focus area to be as wide as the main white plate.
5. Saved the photo to my library.
Final photo.
1. I brought in another photo and went straight to the vintage filter on the main screen.
2. I chose the 4th vintage filter.
3. I played with the different texture options by clicking the checkered box on the bottom bar. I kept it on texture 1.
4. I increased the brightness for this filter [within the vintage tool – not in “tune image”] by sliding my finger to the right.
5. Next, I went to the center focus icon [from the main screen] and applied the “blur” filter and set the blur to 25.
6. Saved the photo to my library.
Final photo.
1. Opened the original copy of the photo above to apply a different filter.
2. Went to the “drama” filter and applied “bright 1.”
3. I decreased the filter strength by sliding my finger to the left.
4. I went to the “center focus” tool and applied the “blur” filter set to 35.
5. Saved to my photo library.
Final photo.
Then, to bring the photos into this post I…
1. Opened my camera roll.
2. Clicked the box with the arrow coming out of it on the bottom bar.
3. Selected the first 5 photos I wanted [max number you can email].
4. Clicked share + then email.
5. I typed my contact info into the “to:” form and then selected “medium.” I always select the photos to be sent as the medium size.
6. Download from your email, save to your designated folder location, then upload into your post.
--
I hope this helped give a little glimpse into the Snapseed app. I’m sure I haven’t even discovered all there is to know about it. One thing I will say is that the photos take me just as long, if not longer, in comparison to when I edit my dSLR photos in Lightroom. Using the iPhone more has been a fun + challenging change of pace!
Be on the lookout for a simple black bean burger recipe on the blog next. No food processor required!
Ashley
In case you missed the related posts…
