
photography 101 {why aren’t my photos sharp!?}
/It’s been a few weeks since the last photography 101 post, and I’m excited to dive back in. At first I wasn’t sure what to cover next, since we’ve pretty much wrapped up camera basics. Many of you have asked for tutorials on staging, editing, lens suggestions, etc. We’ll get to most of those, at some point, but today I wanted to go over one of the most frequent questions I get from readers.
- Why aren’t my photos sharp? [and a few other related questions…]
- Why do my photos look grainy?
- Why isn’t more of the photo in focus?
I hope you’re not looking for a one sentence answer. You know that’s not going to happen. However, I think I can give you a few good tips + reasons as to why your photos are not as sharp as you would like.
I’m not going to get into the super specifics of ISO, aperture, shutter speed, etc. as I don’t want to be redundant. You’ll see links to all of my old posts, throughout this post, if you need a refresher. They can also all be found by clicking on my Photography page link.
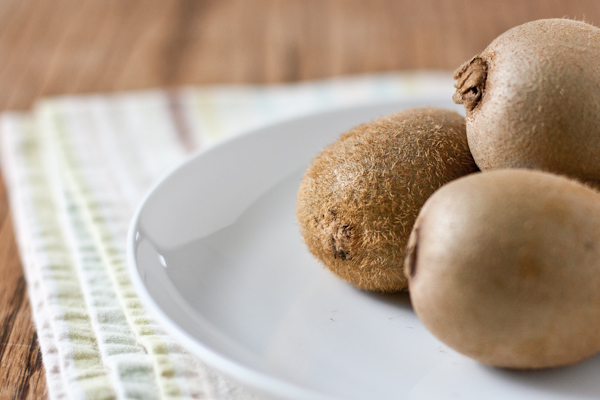
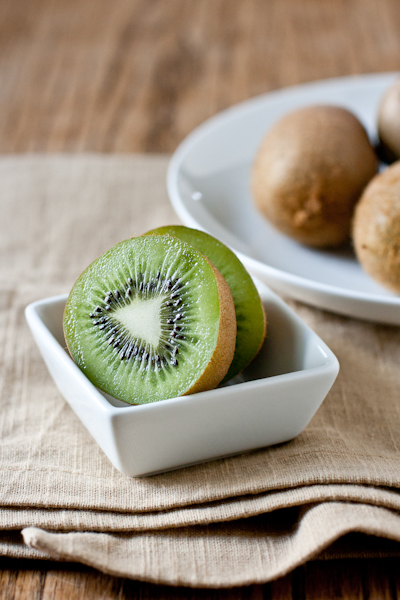
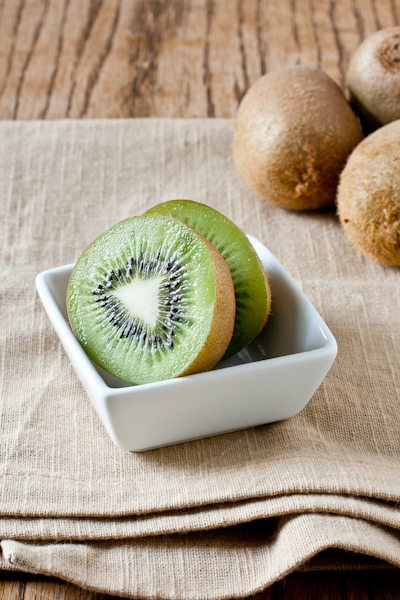
Introducing my model, the kiwi. I used my [new!!!] Canon 50mm 1.4 lens for all of the photos below. I am loving the difference in quality, in comparison to the 1.8. This is my first lens purchase since Chris bought the camera about 4 years ago. But enough about the lens…
Why aren’t my photos sharp?
- You’re hand-holding your camera, and your shutter speed is set too slow.
- refer to the shutter speed post for more detailed information on this
What is too slow for hand holding?
- It depends what you’re shooting, the size of your lens, and the focal length. If I’m hand-holding for food photos, with my 50mm lens, I like to work with a shutter speed of at least 1/80 seconds.
- The longer + heavier the lens, the harder to control in your hands without moving.
- Also, as the focal length increases [the “mm” measurement], the more amplified movement will become.
- Some say, you should use a shutter speed at least as fast as the focal length number. ie: If using a 50mm lens, don’t hand-hold with a slower shutter speed than 1/50 seconds, although to me, that is still a bit slow.
- Anything slower than 1/80 you will start to see blur in your photos from camera shake. Your hands cannot hold the camera perfectly still, and if the shutter is closing too slowly, the camera will pick up the motion in the photo.
- The faster the shutter, the less time there is to pick up the motion from your hands.
- This is why a tripod is so important in food photography.
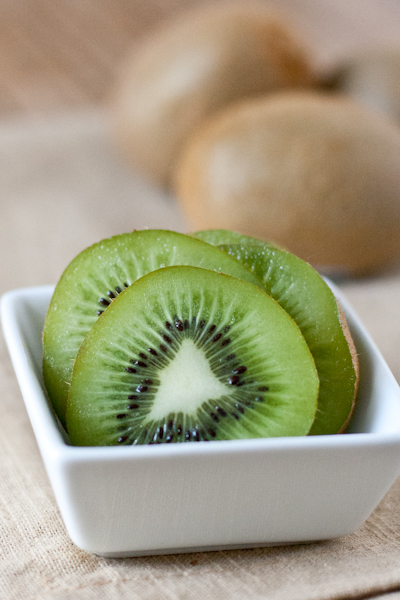
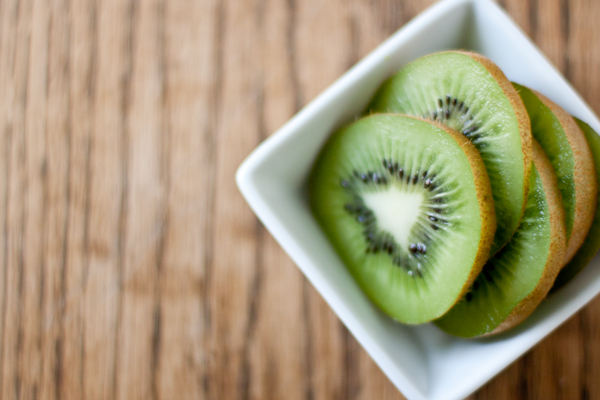
Here are a few photo examples:
handheld : iso 100 : f/4.5 : ss 1/6

While the photo below is improved, it’s still not as sharp as it could be.
handheld : iso 400 : f/4.5 : ss 1/30
Solution:
- If you’re set on keeping your aperture at 4.5, your only option is to bump up your ISO to 800 or higher [making your camera more light sensitive] and then adjusting your shutter speed as fast as it can go, while keeping your photo properly exposed.
- Or, time to invest in a tripod! Make sure to do your research. Check this post for a few tips on what to look for.
Caution!
- Don’t forget, increasing your ISO makes your image grainier, which is another problem we’ll touch on below. Setting my camera to 1600 [max ISO for my camera] creates photos that are nearly useless. Every camera is different. Even at 800, there is quite a bit of noise in my photos. I like to keep the ISO at 400 or below, if at all possible.
So, what do you do if your shutter speed is still too slow for hand-holding, even after bumping up your ISO?
- You’ll need to widen your aperture, which will allow more light into the camera, but will also create a narrower depth of field. This will allow you to raise your shutter speed. If you want a wider depth of field, try moving further away from your subject. The further away you move, the more of your subject will be in focus and vice versa.
- Move your aperture down a stop at a time, and you’ll see your shutter speed increase.
Next up!
Why do my photos look grainy?
- The graininess you’re referring to, is called noise, and it’s caused by having your ISO set too high. While it seems nice that your camera offers you a high ISO, it doesn’t mean it can really be used at the highest setting and produce a quality image.
- As I’ve mentioned before, my camera only goes up to an ISO of 1600. Many cameras have a much higher ISO setting, which makes them much easier to work with in low light settings. Generally, as cameras go up in quality + price, your ISO range increases.
The three photos below, will give you an idea of the graininess caused by setting your ISO too high. I will show you the zoomed out and zoomed in versions of each. These are all using a tripod, allowing the shutter speed to be set much slower than 1/80 seconds.
tripod: ISO 100 : f/4 : 1/13
zoomed: ISO 100 : f/4 : 1/13
Very crisp, with soft + smooth bokeh [part of the photo that is out of focus].
tripod: ISO 400 : f/4 : 1/50
zoomed: ISO 400 : f/4 : 1/50
Still quite sharp, but you can see a slight graininess in the bokeh, past the left edge of the kiwi.

tripod: ISO 1600 : f/4 : 1/200
Even in the full sized image, you can start to see the graininess in the background.

zoomed: ISO 1600 : f/4 : 1/200
The noise is now extremely apparent, even with the part of the photo that is in focus.
Another ISO comparison.
handheld: ISO 400 : f/2.5 : 1/80

handheld: ISO 1600 : f/2.5 : 1/325
The details in this photo, especially the background, are much noisier than the photo above at ISO 400. You can really see it in the uncut kiwi. With the photo above, the edges are much smoother.
Solution:
- Try changing your aperture and shutter speed, before raising your ISO, while still producing a properly exposed photo and one without camera shake from hand-holding.
- Learn the constraints of your camera’s ISO. Take a few photos at different ISO ranges, keeping your aperture constant. Then check to see at what point the ISO is creating too much noise.
- You can also search for this information using Google. You will definitely be able to find a handful of links discussing ISO and your specific camera.
Why isn’t more of the photo in focus?
- This has to do with your aperture setting. The aperture controls how much of the image is in focus and the exposure.
For a quick aperture recap:
- the wider the aperture [opening] -> the more light will be allowed through the lens
- the tighter the aperture [opening] -> less light will be allowed through the lens
- the wider the opening -> the smaller the f-stop # -> the narrower the depth of field
- the tighter the opening -> the larger the f-stop # -> the wider the depth of field
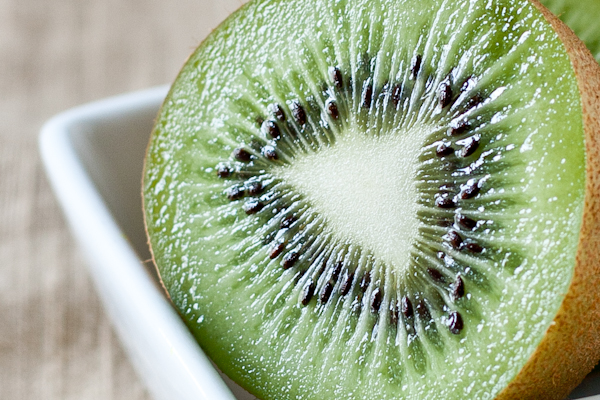
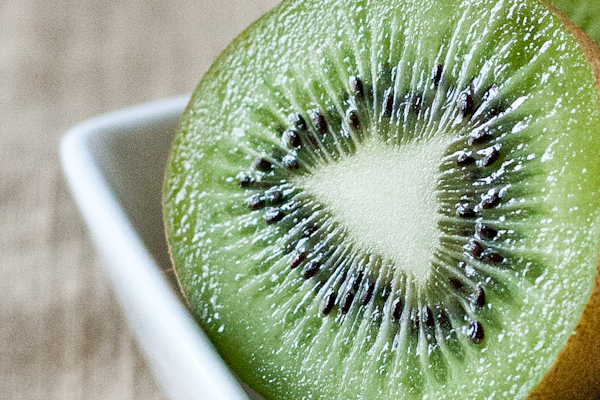
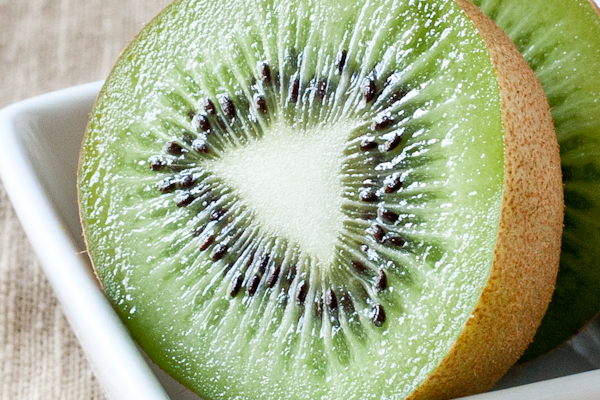
How do I get more of this photo in focus? If we zoom in, we see not much of the photo is in focus at all. Maybe that is the look you’re going for, but maybe you want to show more detail.
tripod: ISO 200 : f/2.5 : 1/50
zoomed in:
The seeds towards the center + slightly to the left are really the only thing in focus.
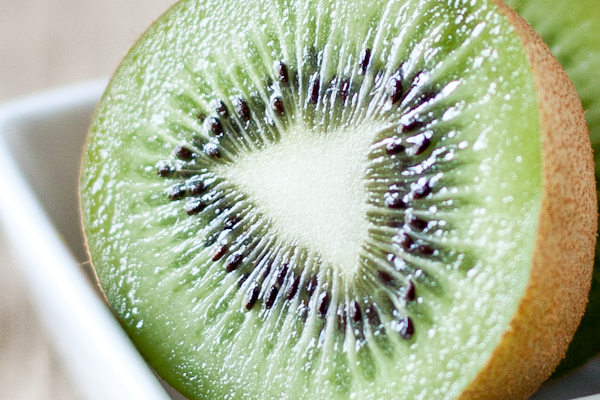
tripod: ISO 400 : f/11 : 1/5
Much more detail shown, when the aperture is set to f/11.
But maybe you want a very small portion of your photo in focus. It all depends on the look you’re going for.
handheld: ISO 200 : f/1.4 : 1/125
Solution:
- Tighten your aperture [larger f-number], which will widen your depth of field, causing more of your photo to be in focus. In turn, you will have to adjust other settings to properly expose the photo.
- Stand further back and your depth of field will also increase.
To learn your how much of of the photo will be in focus, with your specific lens, check out a depth of field calculator. These are extremely useful when learning your lens. You punch in a few of the settings on your camera and it tells you how much of your photo will be in focus.
Example: If you want to set your 50mm lens to f/4 and stand 1.5 feet away, only .02 feet in front of and behind the focal point, will be in focus.
Other reasons your photos may not be sharp:
- Your lens or lens filter are smudged or dusty.
- Quality of lens. Many stock lenses [that you buy with the camera body] are of lower quality, and are not ideal for detailed food photography, or indoor lighting conditions.
- While my 50mm 1.4 [~$380, but I snagged it on sale for $320!] , produces a sharper image than my 50mm 1.8, an even better image will be produced with Canon’s 50mm 1.2L. But that comes at a cost of $1400. I’ll be sticking with the 1.4 for quite some time.
- If you’re looking for extreme, close-up detail, you may want to look into buying a macro lens. This is to capture the detail in things like insects, flowers, seeds in fruit [like kiwi!], etc. Check the Canon 100mm 2.8 [$600] and the Canon 100mm 2.8L [$1000]. The difference between those lenses is mainly the “Canon L” quality glass.
Recap: Why aren’t my photos sharp?
- Are you hand-holding your camera, with a shutter speed that is too slow?
- Try increasing the speed of your shutter. You’ll have to change a few other settings to compensate the shutter speed adjustment.
- Is your ISO set too high, producing a noisy image?
- Before raising your ISO, to increase exposure, try playing with your aperture + shutter speed.
- Is your depth of field [aperture] too narrow?
- Tighten your aperture and/or stand further away from your focal point, which will cause more of your photo to be in focus.
- Is your lens dirty?
- Are you using the stock lens for food photos?
I hope you’ve found some of these solutions to be helpful in making your photos as crisp as possible.
See you again tomorrow!
Ashley


