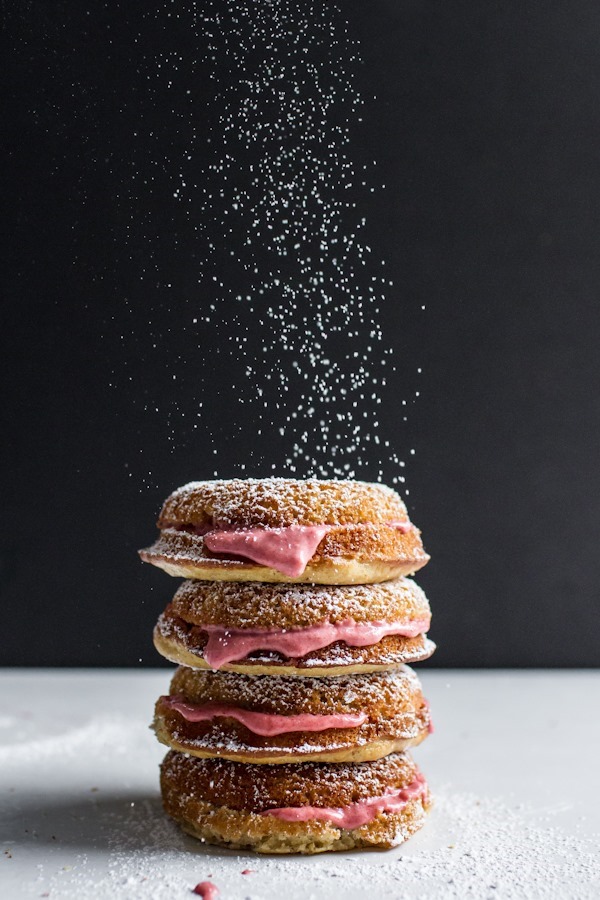
Food Photography Tip of the Week |10|
/Food Photography Tip of the Week |10|
Let’s capture motion: powdered sugar edition
Last week got a little wordy, so I want to keep today’s lesson simple + fun. It’s really all about getting your set up dialed in before you start and then playing with your shutter speed. Let’s get started!
1. Get your shot set up. I know this seems like common sense but you really want your food to be positioned just right so you don’t have to adjust it once you start adding the powdered sugar element. Take a few test shots and make sure it’s what you’re going for. Also get your background, surface, light bounces, etc. in position.
2. Use a contrasting background color. The darker your background the more the powdered sugar will show up. However, if you want the powdered sugar to be really subtle you’ll want to use a light background color.
3. Use a tripod. There is no possible way you can hold a camera while sprinkling powdered sugar on doughnuts/cake/brownies/etc. and actually click the shutter to take the photo. Unless you have super powers.
4. Use a remote shutter. This is not 100% necessary, as the last 2 photos were not taken using one. However, it makes this task [and pour shots, etc.] much easier to pull off. This is the remote shutter [only $17] I use. All you have to do is plug it in then start snapping. Using a remote shutter allows you to stand right next to the food so you can sprinkle the powdered sugar with one hand while holding the shutter in the other and clicking to capture the image. Without a remote shutter, you’ll have to sprinkle with one hand and stretch your arm to your camera’s shutter to click at the same time.
5. For a powerful image shoot straight on + stack your food. Shooting straight on while stacking a few of your baked goods [unless it’s tall like layered cake] will create a lot of impact in your image and help to fill up the vertical space. You’ll feel as though you can really pluck the food straight from the screen, as it’s a bit more “in your face.”
6. Shoot vertically. This allows you room to stack the food and also leaving enough space for a long stream of powdered sugar. It also helps to create a more powerful image.
7. Shutter speed controls the powdered sugar movement. The faster the shutter the more “frozen” the powdered sugar will appear. The slower the shutter the more blurred the movement will be. Play around with the shutter speed while keeping the photo properly exposed until you reach the exact look you want.
8. Decide where your focus will be. Typically, in straight on shots like this you want to focus on the closest part of the image to the lens. For instance, I focused on the strawberry lemon curd oozing from the top doughnut in the 4 photos below.
9. Decide on your depth of field. I like to keep a fairly shallow depth of field so the focus is on the front of the doughnuts with the powdered sugar fading behind.
10. Get a mini mesh strainer or powdered sugar shaker. This is what you’ll use to achieve even shower of powdered sugar.
Time for a few examples so you can see what kind of settings I used and how they affect the motion in the image.
above: (35mm 1.2L lens) ISO 2000, f/3.2, SS 1/1250
In the above + below images I used a very fast shutter to create more definition in the powdered sugar and more clearly freeze the motion. The blurred specks are due to the shallow depth of field. If I wanted the specks more in focus I would widen my depth of field [larger number].
In the photo above I lightly tapped the strainer while in the photo below I gave it a harder shake.
below: (35mm 1.2L lens) ISO 2000, f/3.2, SS 1/1250
above: (35mm 1.2L lens) ISO 640, f/3.5, SS 1/400
In the image above I slowed the shutter speed by over half but it was still pretty face. The specks of powdered sugar lengthened because more of the motion was captured while the photo was being taken. The slower the shutter the more movement/motion you’ll see.
I decided I liked the more defined powdered sugar specks and went back to the 1/1250 speed. In the photo below I moved my hand to try and have powdered sugar falling in the background of the entire image. Like I said, it’s all about experimentation!
below: (35mm 1.2L lens) ISO 2000, f/3.5, SS 1/1250
above: (50mm 1.4 lens) ISO 1000, f/3.5, SS 1/250
In the photo above you’ll notice a much bigger blur to the powdered sugar in comparison to the first 4 photos. However, I felt the powdered sugar looked too blurred at this speed. I much prefer the image below which was taken at an even slower shutter speed of 1/80. The powdered sugar has a softer feel with more of an even look, while in the photo above it’s a bit harsher. The motion has less of that “blur” feel and presents more as smooth movement.
These shots were created for the cover of my doughnut cookbook and the image below was the final shot!
below: (50mm 1.4 lens) ISO 640, f/4.0, SS 1/80
What do you think? Are you a little less intimidated to try capturing motion in your photos?
Ashley


