THREE recipes just.for.you.
/So, the past 2 days have been in the 60’s and now this! HUGE snowflakes coming down fast. Ignore our gross fence and recycling bins please :) The houses in our neighborhood all have alley’s behind them which is kind of cool because all of the garages face the alley instead of the street.
Dakota is ferocious.

While it may look like Kenna is pooping, she is not. That is her sprint style. She runs figure 8’s in the backyard while Dakota tries to cut her off and chest smash her. It’s quite entertaining.

And then they stop to smell the roses. GO AWAY SNOW!!

Do you know what time it is?? Time to get your fanny into the kitchen to start cookin’ up some quinoa goodness!
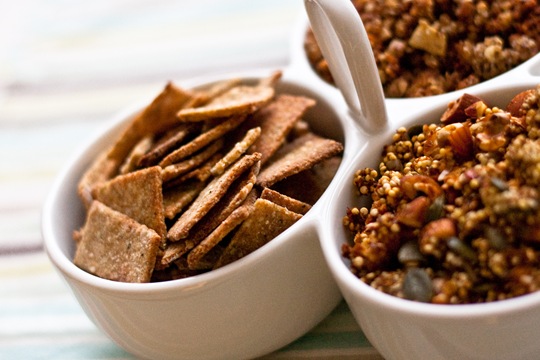
Let’s start with the Quiona Crunch Cereal that I made the other day.

Quinoa Granola [gluten free, low sugar, soy free, vegan]
- 1c quinoa, rinsed well
- 1 can [15oz] light coconut milk
- 5 cinnamon sticks [or 1t cinnamon]
- 2t vanilla
- 2T chia seeds
- 1/4c ground flax meal
- 2T hemp seeds
- 1/2c chopped almonds
- 1/2c chopped walnuts
- pinch of salt
- 1T sucanat
- 2T brown rice syrup
- cinnamon for dusting
- Bring quinoa, coconut milk, cinnamon and vanilla to a boil.
- Reduce heat and simmer for ~15min until liquid is absorbed. [I realize that normally you would add 2c of liquid for 1c of quinoa, but this works better with less liquid]
- Preheat oven to 350*
- In a mixing bowl combine quinoa mixture, chia seeds, flax, hemp seeds, almonds, walnuts, salt, sucanat, and brown rice syrup.
- Stir until well combined.
- Line a medium size pan with parchment paper
- Spread mixture evenly on the pan and bake.
- Stir quinoa about every 10min until it is golden brown and almost completely dried out. This will take about 1hr. If it seems like it’s browning too fast you can lower your oven temp to 325*.
- Let completely cool, dust with cinnamon, and store in a plastic bag or storage container.
*It is really important that you let it cool ALL the way or it will get soggy when you store it.
**I totally made this up…so if you don’t like it, don’t hate me ;)
The texture has a unique crunch because it’s such a small grain. You can definitely add more ingredients to this to your liking and adjust the sweetness as well. 1-2T of maple syrup or honey would have been a great addition. I was trying to keep as much sugar out as possible. This has a sliiight sweetness but overall has a very nutty flavor. If you want to kick up the coconut flavor, add in 1/4c unsweetened shredded coconut. You can also add in 1T unrefined coconut oil to the quinoa mixture before cooking, which I will definitely do last time. It will infuse a richer coconut flavor like in my coconut rice.
So far I have eaten this on oatmeal, with yogurt, with whole milk, and with hemp milk. I think my favorite was actually in the hemp milk! It’s a fun gluten free alternative to oat granola!
…
Next up, we have my also completely made-up gluten free, sugar free, vegan snack mix!

Quinoa Millet Snack Mix:
- 1/2c quinoa, rinsed well
- 1/2c millet, rinsed well
- 2c popped popcorn
- 1/4c ground flax meal
- 1/3c pepitas
- 1/3c sunflower seeds
- 2T chia seeds
- 1/2c almonds, chopped
- 3T olive oil
- 1T water
- 1t garlic powder
- few grinds of black pepper
- 1T soy sauce [wheat free!]
- 1t sweet red chili paste
- few splashes of fish sauce
- Preheat oven to 325*
- Pour rinsed quinoa + millet on paper towels. Pat dry and let sit for a few minutes.
- Pour quinoa, millet, flax, nuts, + seeds into a mixing bowl. Stir together.
- Combine oil, water, soy sauce, chili paste, fish sauce, garlic powder, + black pepper in a small bowl. Whisk together to combine.
- Pour liquid over dry ingredients until well combined.
- Line a pan with parchment paper and spread mixture evenly overtop.
- Bake until mixture is completely dried out, gently stirring every 10min. You don’t want it to all break up into tiny pieces.
- This took ~30min.
- Let cool completely and store in a plastic bag or storage container.
The flavor of this was awesome. It is super crunchy and just packed with flavor. I thought the popcorn would help bind the wet and dry ingredients together along with the flax meal. There were some clusters but it broke apart pretty easily. That was the only downfall. This could be good as a savory topping on stir fry [or similar] or just eaten by the handful! mmmm
…
Next UP. Cracker time!! I modified the original recipe from Bob’s Red Mill quite a bit. These are vegan, soy free, sugar free and ALMOST gluten free. I was so silly and added half whole wheat flour with the quinoa flour before I even realized what I was doing. *A reader suggested using garbanzo bean flour instead of the whole wheat, to make them gluten free. I will definitely do this next time!

REAL FOOD crackers! Not only a machine can make crackers..you can totally bust these out at home!!!
- 1c quinoa flour
- 1c whole wheat flour [or garbanzo bean flour if you want it gluten-free]
- 1t sesame seeds
- 1t baking powder
- 1/2t sea salt
- 3T + 1t olive oil
- 2/3-3/4c water
- 1T nutritional yeast
- 3/4t garlic powder
- 1t basil
- 1t rosemary
- olive oil/salt/pepper to coat before baking
If you are making your own quinoa flour here are the directions:
- Preheat oven to 250*
- Rinse 1c quinoa.
- Spread on a small baking sheet.
- Bake until completely dry, stirring often. ~30min.
- Grind in food processor or coffee grinder [not full of coffee :)] until powdery. Mine still had some full seeds in it, which is fine.
Somewhat tedious but it saves you from buying it!
- Combine the flours, seeds, salt, seasonings, nutritional yeast and baking powder.
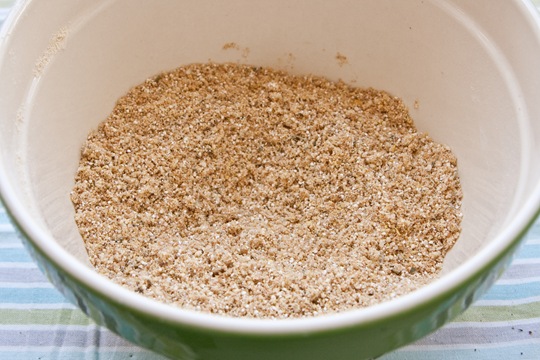
- Rub in the oil with your fingers until well combined. The mixture will be somewhat crumbly.
- Add water in a small amount at a time and mix with hands.
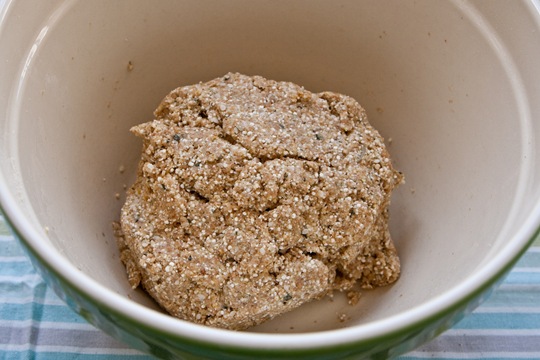
- Add only enough water until you have a formed ball of dough that is soft but not falling apart.
- Cover the dough and let rest for ~10min.
- Lightly grease a large baking sheet.
- Preheat your oven to 400*
- Roll out dough [on well floured surface] as thin as possible. About 1/8”-1/16” thick.
- Cut into crackers with knife or pizza cutter. I cut appx. 1x1” squares.
- Use a spatula to transfer the crackers to a pan.
- Lightly brush crackers with olive oil and sprinkle s+p overtop.
- Bake 7-10min.
I lowered the suggest oven temp because I think they needed to be cooked longer to ensure they all browned evenly. You want to make sure they are all a golden brown before removing from the oven. This will allow for maximum crispness :)
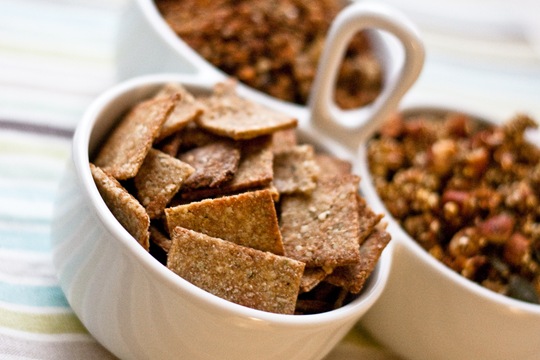
I REALLY like these crackers…It took me a few to get used to them because they are heartier than normal boxed crackers. I would say if you like Mary’s crackers or Dr. Kracker you will like them. They are thick and crunchy and FULL of flavor. I am loving them, especially with my homemade hummus!
I wanted to post the process photos again because I feel like they are important to see. I was worried when the dough cracked as I rolled it out, but it wasnt’ a problem. Just keep the dough, surface, and rolling pin well floured.
After oil was rubbed into the dry mixture.

After the water was added.

Have patience with the rolling out. It will crack. Roll as thin as possible!

Cut + transfer to a pan.

ENjoy!

I was planning on getting this post up earlier today but it ended up getting a little crazy around here. I had some unexpected errands and a drive that should have taken 1.25hrs that ended taking 2.5. We got a CRAZY storm out of nowhere, as you can see in the above photos :) I also got hit with a major sore throat out of nowhere! I have a lot more photos from today..but they will wait for tomorrow..
Off to eat something for din…and then maybe a bath and BED!
Let me know if you try any of my crazy concoctions out!
<3 me


